 |
 |
 |
 |
 |
 |
|
 |
 |
 |
 |
 |
||
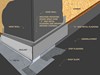
Skylight Flashing
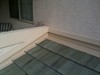
Installation of Underlayment and Primary Roof to Wall Flashing
This web page is a great source for training new roofers as well as refreshing the experienced roofer. Time and again I have heard from contractors "It sure would be nice if I could get all my crews to install roofing materials in the same way."�
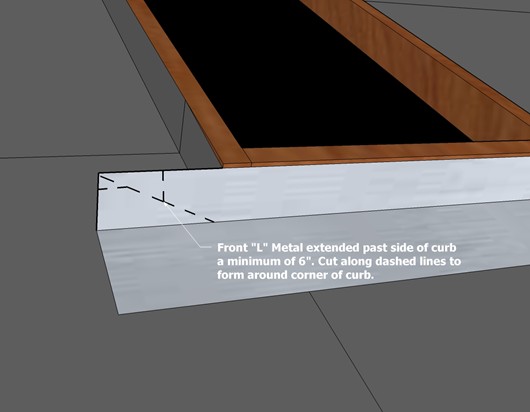
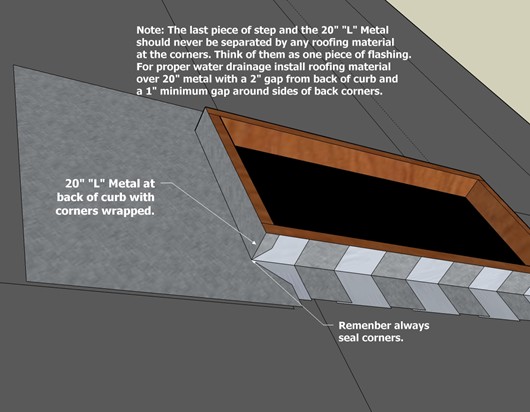
The purpose of all roof flashing including Skylight Flashing is to keep as much of the moisture as possible on the surface of the roofing material.
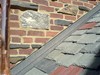
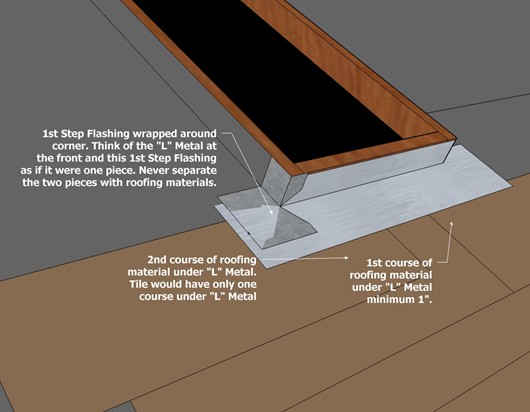
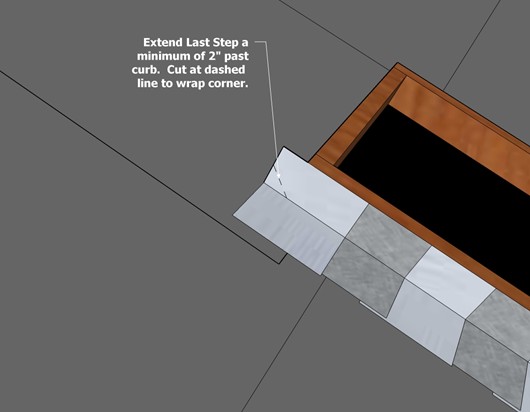
Step Flashing is laced over each course of Asphalt Shingles, Cedar Shakes and Shingles, and most Alternative Steep-Sloped roofing materials no more than 1"� above the weather exposure of the roofing being installed. In other words, no more than 1" above the butt of the roofing material of the next course. With Tile, the Step Flashing is exposed and placed over the surface of each course starting at the butt of one course and extending 3" up under the Tile of the next course. Tile also requires a secondary flashing to be installed directly over the underlayment, which is not discussed here but is in our web page Tile Eave to Rake Wall Installation.
Wrapping the skylight, chimney, and walls, etc. with an Ice and Water Membrane instead of the standard underlayment is always a good idea and may be required in some areas.
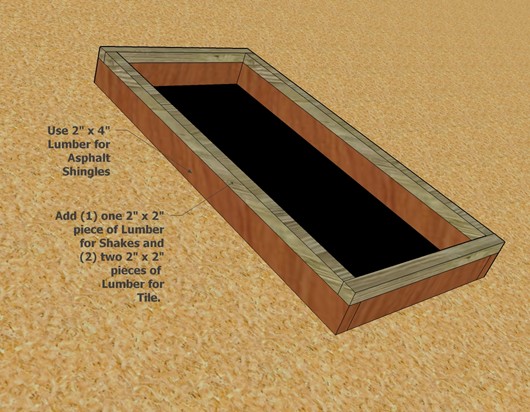
Raising the skylight curb may be required to properly flash and roof around it. The easiest way is to do this is to add one or two layers of 2" x 2"� lumber to the top of the existing curb. This also changes the look of the interior side of the skylight. To hide the additional skylight framing simply install 1"� x 4" or larger trim boards over the edge of the existing drywall. In most cases this will also improve the appearance of any interior skylight shaft.
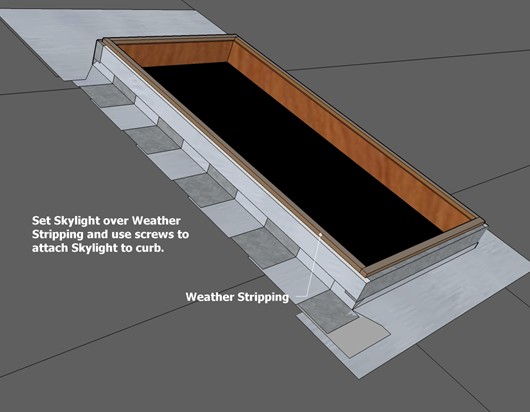
Remember to always fasten down the skylight to the curb. Use corrosion resistant screws.
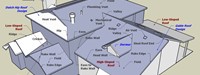
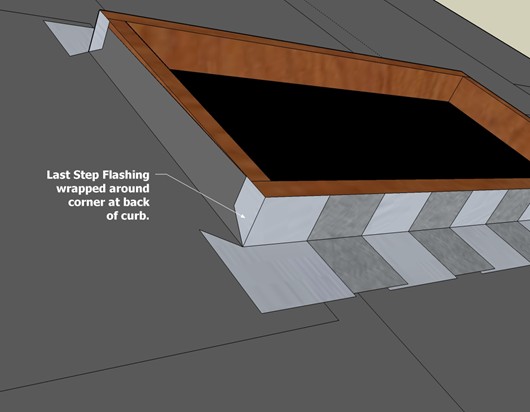
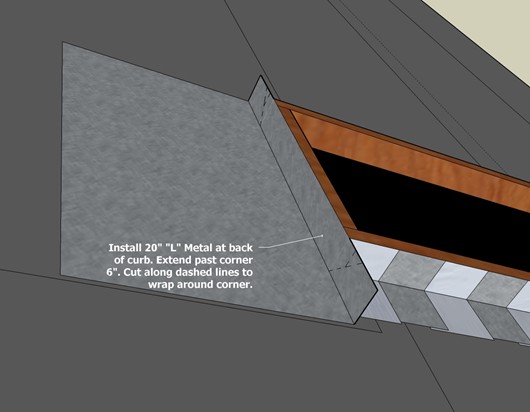
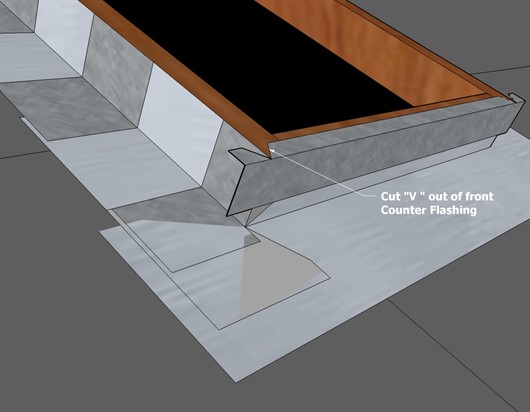
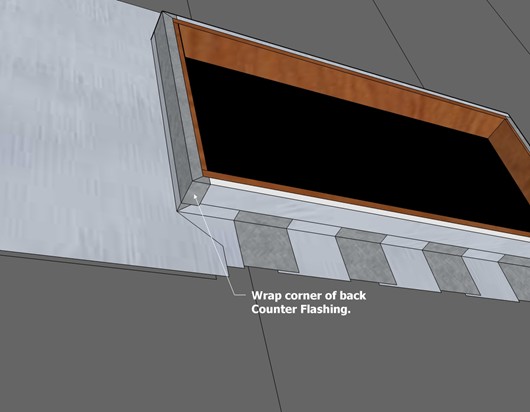
There are many ways to install the primary flashing and roofing materials around skylights. Some wrap corners, some don't. Some counter flash, some don't, etc. The following are drawings of one tried and true method presented in step-by-step installation procedures from dry-in to setting a standard 2' x 4' skylight on a curb.
We do not guarantee that by following these installation procedures that a leak will not occur, but it will greatly reduce that chance and other roofing problems that frequently occur at skylights. Many of the procedures illustrated here are the same for head walls, rake walls, and chimneys.
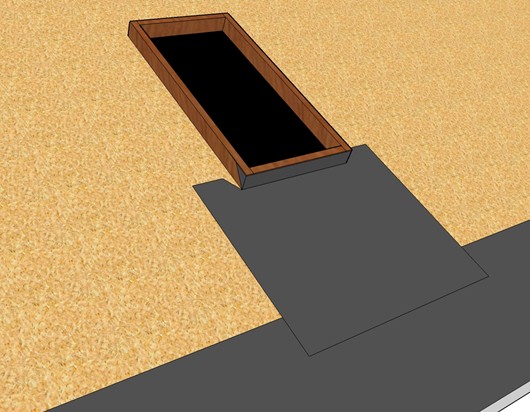
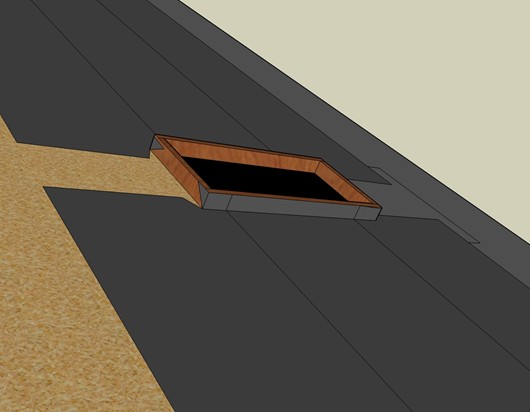
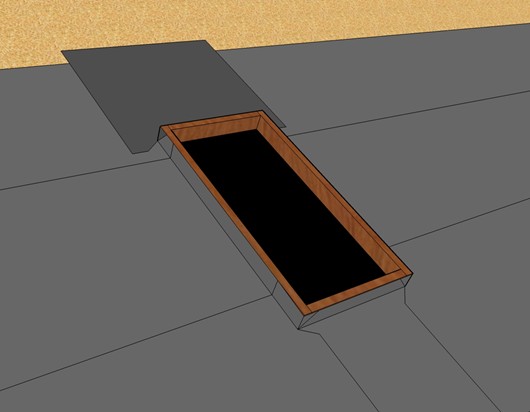
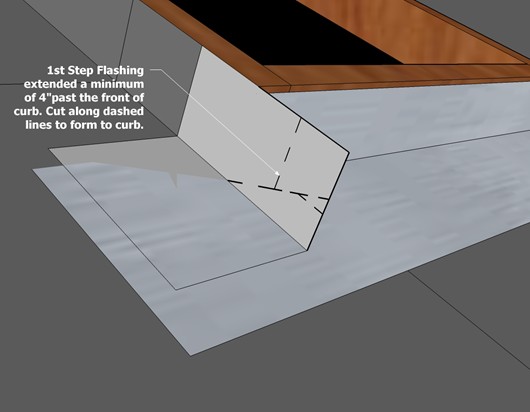
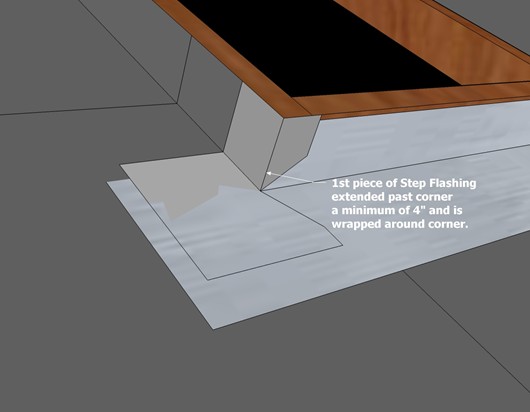
The first four drawings illustrate an easy way to dry-in around skylights. Notice the front and back of the skylight are treated independently of the rolls of underlayment as they are installed across the roof. Using these separate pieces of underlayment saves the hassle of trying to cut full rolls around the skylight and makes for a more water tight installation.


Visit our
Roof Inspection Services
web page
and the many other web
pages throughout this website to find
answers to your roofing questions and
solutions to your roofing problems.
Page Revised/Updated 2/03/2023