 |
 |
 |
 |
 |
 |
|
 |
 |
 |
 |
 |
||
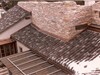
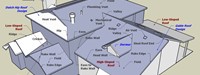
Eave to Rake Wall Flashing
One of the most troublesome areas of the roof is the Eave to
Rake Wall Intersection.
However, the problems in this area can be
greatly reduced if some guidelines are followed.
(See our web page Roof
to Wall Intersection Flashing first before reading this web
page.)
The Guidelines below include sketches for Flashing the wall before installing any type of Sloped-Roofing Material at Eave to Rake Wall Intersections.
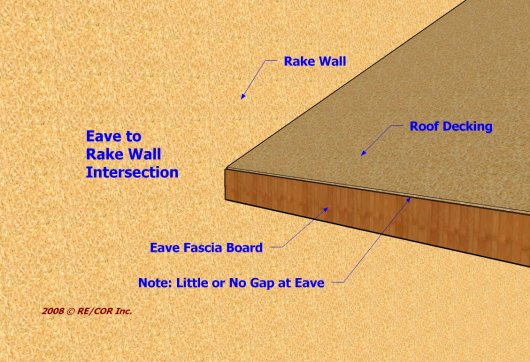
Before installing any roofing material, make sure that others before you have correctly completed their job with the Fascia Trim Board and Roof Decking intersection. This intersection should look as sketched above. See Eave Framing/Trim Problems web page.
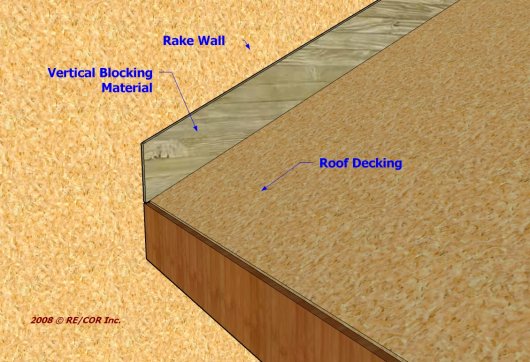
A piece of Vertical Blocking/Backing Material is installed at all Roof to
Wall Intersections.
This Vertical Blocking/Backing Material will vary in
thickness depending on the thickness of the Exterior Wall Covering.
It can be equal to
the thickness of the Exterior Wall Covering or slightly less but should never be thicker
than the Exterior Wall Covering.
How far up the wall the Vertical Blocking/Backing Material extends will vary depending how high up off the roof deck the roofing material's surface is. The minimum height of the Vertical Blocking/Backing Material is 5 1/2", the dimension of a Nominal 6" wide board. A Nominal 2" x 4" board is only 3 1/2". This is too short for even the minimum roof flashing height of 4" up the wall that is required by some roofing materials.
The end of this Vertical Blocking/Backing Material is cut to a
true vertical or plumb and
must extend down the wall and be flush with the outside
face of the Eave Fascia Trim Board as shown above.

The standard eave roofing materials are then installed
extending
the Ice & Water Membrane up the wall a minimum of 4".
See
Eave Roofing Material
Installation web page. Sandwiching the Eave Metal Drip Edge between
Ice and Water Membrane is always a good idea.
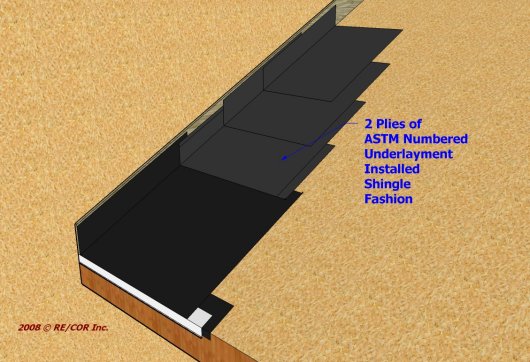
The Underlayment is also extended up the walls a minimum of 4" on
the outside face of the Vertical Blocking/Backing Material.
Shown is a two ply
Underlayment installation which means that it is applied shingle fashion.
Example: a 36" wide underlayment is lapped 19" to obtain a true 2 ply
installation.
The Through the Wall (Z Bar) Flashing is placed over the Vertical
Blocking/Backing
Material.
The Underlayment and the Roof to Wall Flashing can be installed anytime, even
after the placement of the Through the Wall (Z Bar) Flashing.
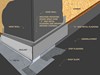
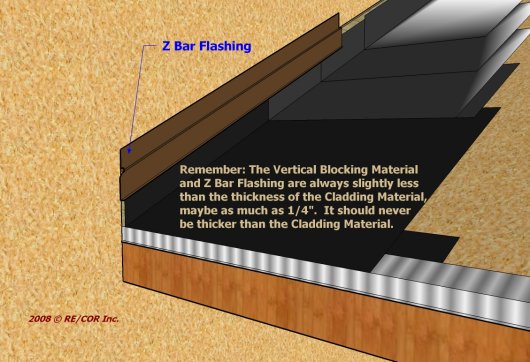
This close-up sketch shows details of the intersection of the Eave to Rake Wall.
-
The Vertical Blocking Material end is cut plumb and flush with the face of the Eave Fascia Trim Board.
-
Eave Metal Drip Edge stops just short of the thickness of the Exterior Wall Covering so it and the Gutter (installed later) will end on the face of the Exterior Wall Covering.
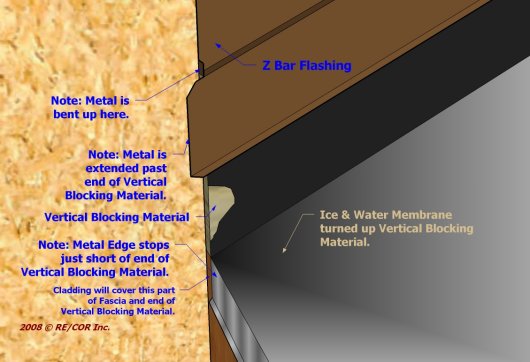
-
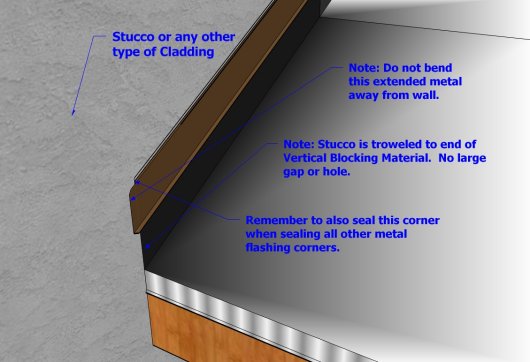
The lower face of the Through the Wall (Z Bar) Flashing is extended past the end of the Vertical Blocking/Backing Material an inch or two to cover the intersection of the Exterior Wall Covering and the end of the Vertical Blocking/Backing Material. It also serves as the counter flashing of the roof to wall flashing that will extend into the gutter.
-
To make a better seal (sealed later) and divert water off the top of the Vertical Blocking/Backing Material, the Through the Wall (Z Bar) Flashing is extended here past the end of the Vertical Blocking/Backing Material, cut, and bent up about an inch.
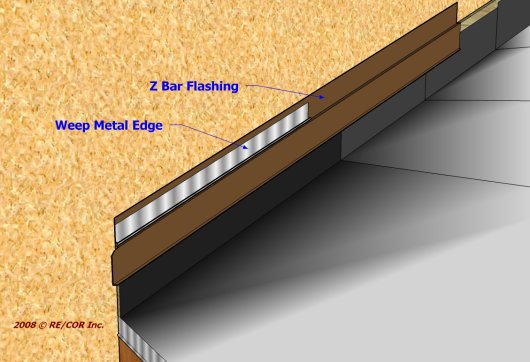
If the Exterior Wall Covering includes a Weep Metal Edge, it is next installed over the Through the Wall (Z Bar) Flashing.
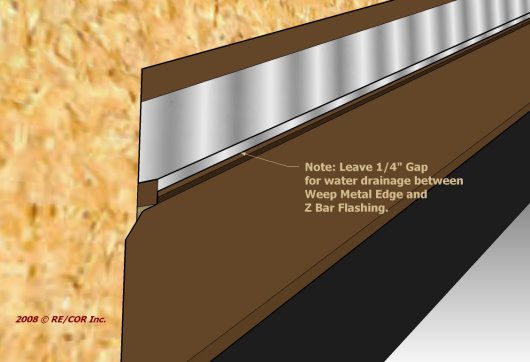
This Weep Metal Edge is placed about 1/8" to 1/4" above the top of the Vertical Blocking/Backing Material to provide positive drainage onto the Through the Wall (Z Bar) Flashing. Setting it down directly on the Through the Wall (Z Bar) will block the weep holes.
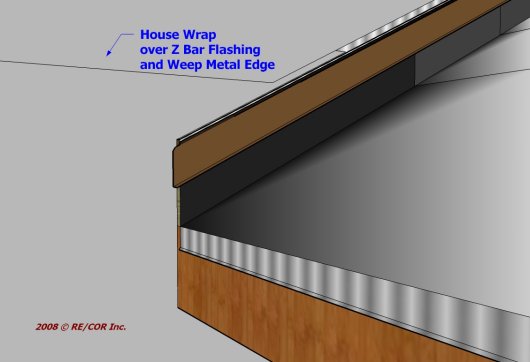
Next the house wrap is placed over both the Through the Wall (Z Bar) Flashing and the Weep Metal Edge.
Now any moisture that gets in behind the Exterior Wall Covering will drain
down the wall House Wrap onto
the Through the Wall (Z Bar) Flashing and onto the roof surface once
the roof flashing and roofing material is installed.
The Roofing Material and Roof Flashing can be installed at any time with
ease. If the roof ever needs to be replaced,
the new Underlayment and Roof
to Wall Flashing can easily be installed without disturbing the Exterior Wall Covering.
Visit our
Roof Inspection Services
web page
and the many other web
pages throughout this website to find
answers to your roofing questions and
solutions to your roofing problems.
Page Revised/Updated 2/27/2023